If you are familiar with plastic wire baskets, then you would have never missed to notice the attractive handles that accessorize these baskets. Since the older times, it is a common practice for making handles with the same wire that were used in making of the plastic wire baskets.
Handles made with plastic wires can be of different types and come in different styles. As these handles give us the flexibility on the lengths, thickness and pattern, most people go for these hand-made handles instead of fixed length ready made handles sold in the shops, particularly for these wire baskets.
Note: Not only with plastic wires, we can make use of Scoubi dou strings/Scoobie wires, palm leaves or Fish wire/Mat wire for making these handles. You can see the handle made of Fish wire in my earlier post of Flower Basket. If you learn the method, you can pretty much use any wire type that you can get hold of to make this handle.
There are three most common types of handles that we can make with these plastic or fish tape wires. I am going to explain one-by-one in my upcoming posts. Here in this post, we will see how we can do one such simple type of handle which was used in the Flower Basket Model.
Here is the handle:
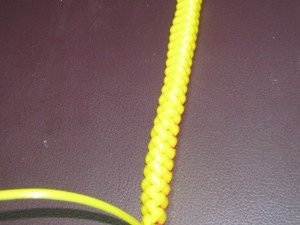
Plastic Wire Handle – Front View
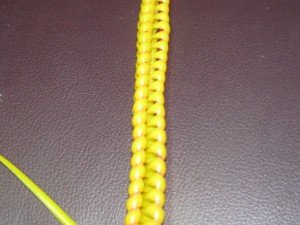
Plastic Wire Handle – Back View
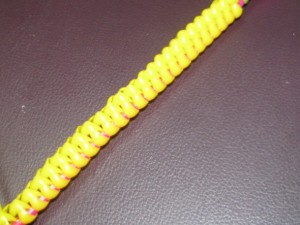
Plastic Wire Handle – Side View
looking at the above images, it may seem like a complicated weaving, but it is not. It is one of the easiest handle, even kids can make with ease. You will see it as we start making the handle.
Steps:
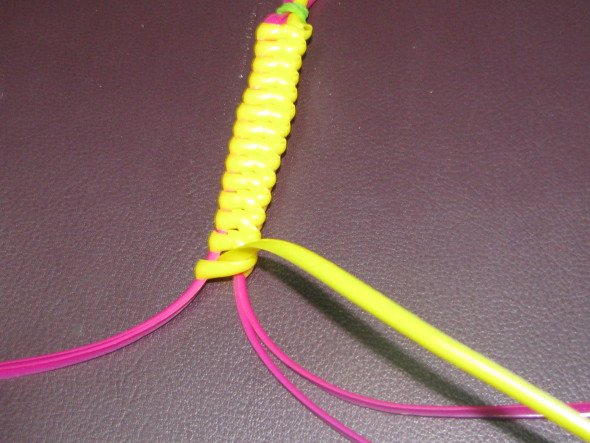
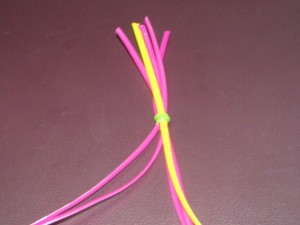
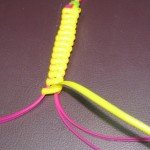
1. You need one extra long wire usually 5 times more than the length of the handle, I call this wire as the running wire or working wire. I have used yellow for this wire here.
2. We also need 4 short wires, usually 1 feet more than the length of the handle, I call these wires as guide/fill wires as their main purpose is to fill the handle with their volume and guide the way for our weaving.
Here I have chosen, pink wires to differentiate it from running wire, but you have to use the same color as your running wire for this. Otherwise, you will see some tints of this guide wires popping out here and there which may not look good on these handles. Also we don’t have to strict about the numbers here, even we can use 2 wires instead of 4 wires which will give a thinner look. More the numbers of this guide wires, thicker will be the resulting handle.
3. Before start the weaving, we have to hold these wires and put a knot or use a rubber band at the top to hold these in position. Divide the guide wires in groups of two. Bring two wire to left side and the other to right side, in our case, two pink wires to left and other two pink wires to right side for ease of weaving.
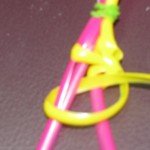
4. Bring the running yellow wire to the right for making our first knot. With the running wire, form a loop over the right hand guide wires and put a knot. Tighten it.


5. Bring the running wire to the left and put a knot over the left hand side guide wires.


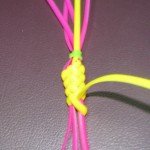
6. Now bring the running wire to the right and repeat the same. After the right side knot is done, then move on to left. Like this we have to go on making the knots on both the sides alternatively, until we get the desired length of the handle.


You can see the progress in the below figures.
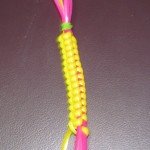
Simple but a nice looking handle for baskets…


Comments are closed.