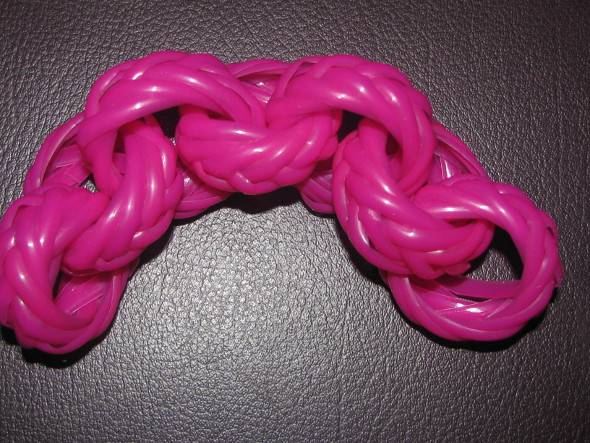
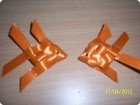
Long back during late eighties and early nineties, most of us used to make this type of rings using basket making plastic wires…These rings were mostly used as Thorans or Wall Hangings…Some used to hang these rings interlocked as in the picture below, on either side of the doorway! Since I have started this blog, I have been trying to recall the method to make these rings…Finally found it…Here are the rings!
In this post, I will explain how to make these rings in a simple way…by keeping the complexities to a bare minimum 🙂 Although, I have a used a cylinder as a guide to make this ring, you can use your fingers if you are comfortable. Once you make few rings, you will know which way to follow.
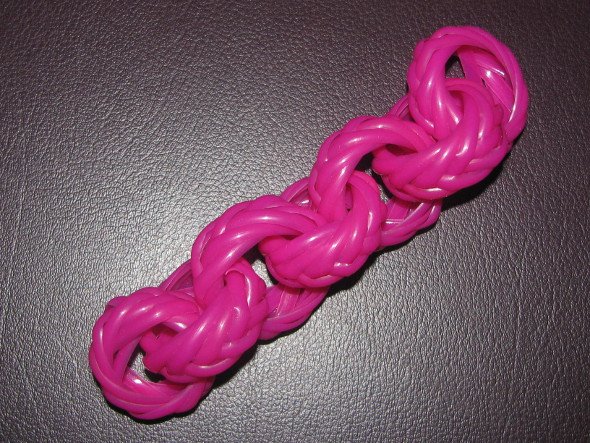
Plastic Wire Rings or Chain
-
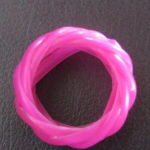
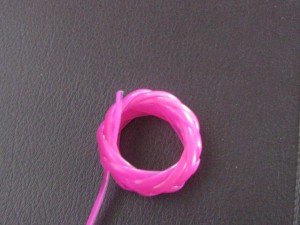
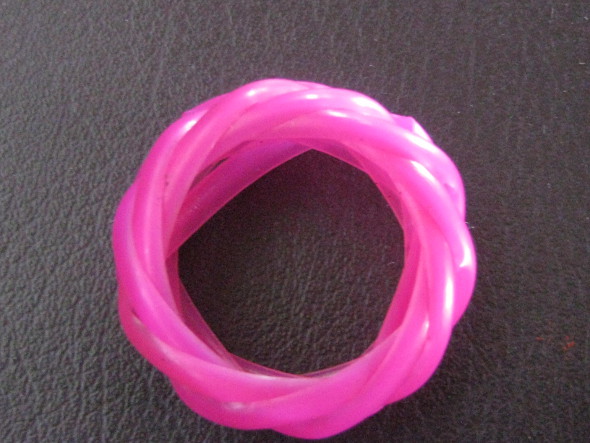
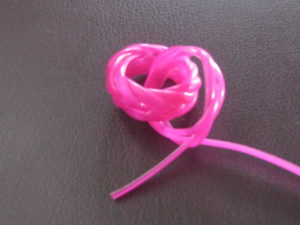
- Single Plastic Wire Ring
-
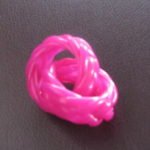
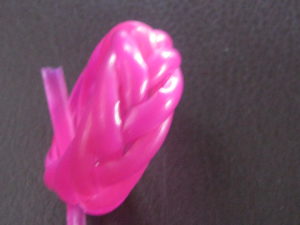
- Two Rings Interlocked
Materials Required:
1.Plastic Wire (Basket Making Wire). For making one ring of 1 inch diameter requires 34 inches of length to be very exact. Also you can make a bigger or smaller ring, accordingly you have to increase or decrease the length of this wire.
2. Cylinder of 1 inch diameter as guide (optional!). You can use any cylindrical rod or just your fingers (Index and Middle fingers combined.)
Instructions:
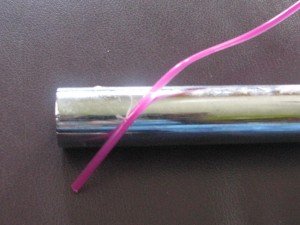
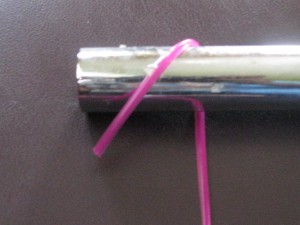
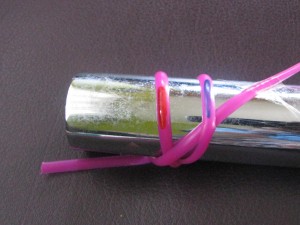
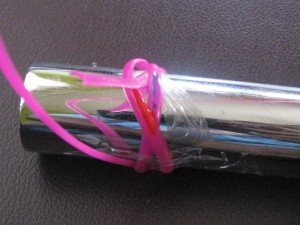
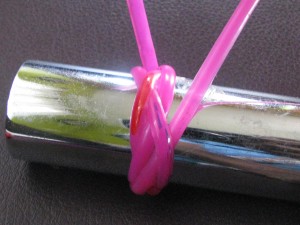
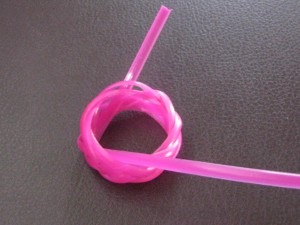
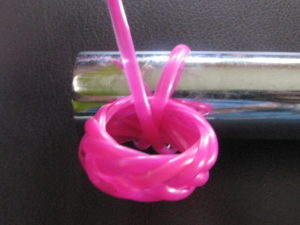
1. Hold the cylinder in horizontal position and hold the wire as it is shown in the picture, I have used one tape…you don’t have to! Hold the wire in position. Hereafter I will call the wire end pasted on the cylinder as short end and the other long end as free end for clarity.
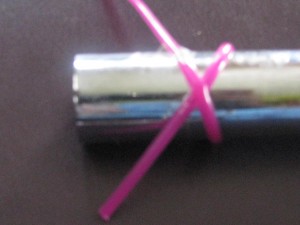
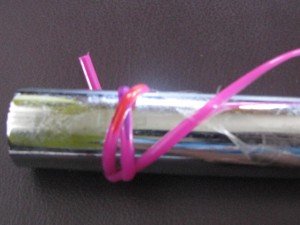
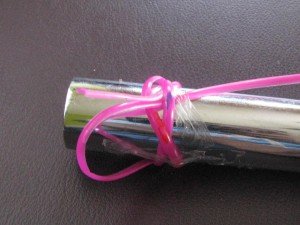
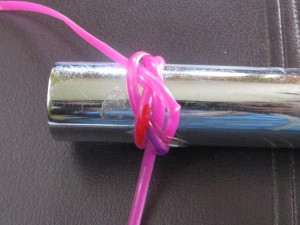
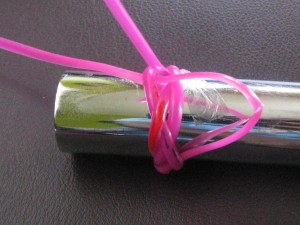
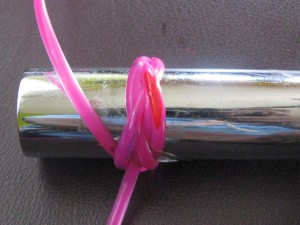
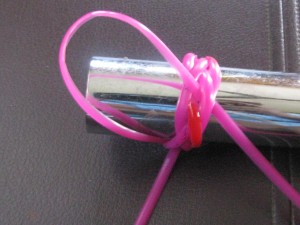
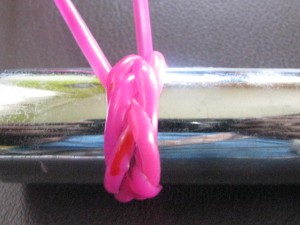
2. Wrap it around the cylinder one time and bring it over the other short end to form a cross as shown below.
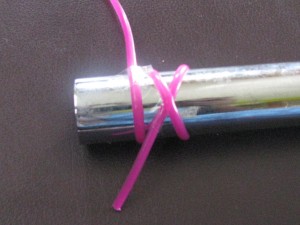
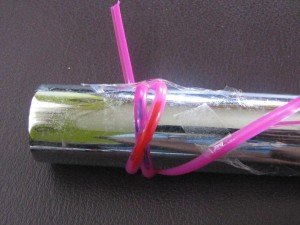
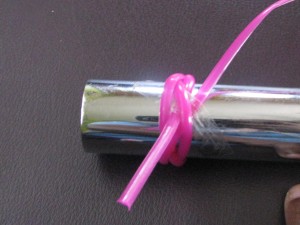
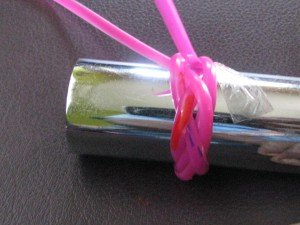
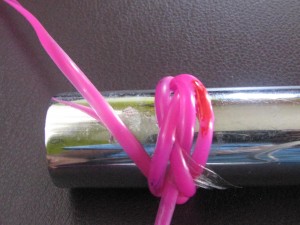
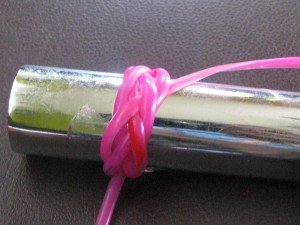
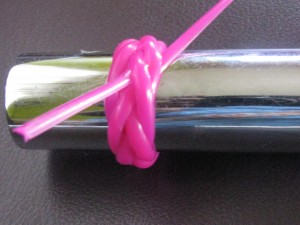
3. Wrap the wire around the cylinder one more time, this time bring the free end under the short end. This will look like Roman number IX if you are doing it right!
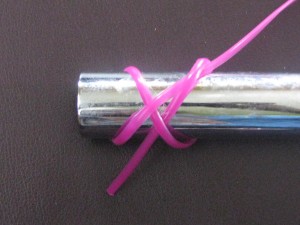
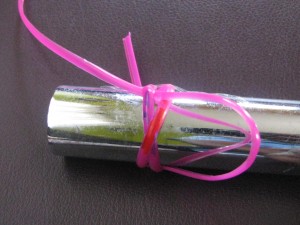
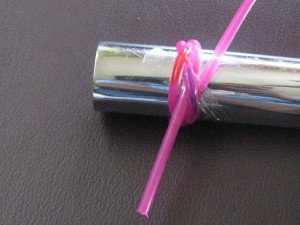
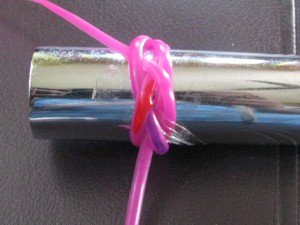
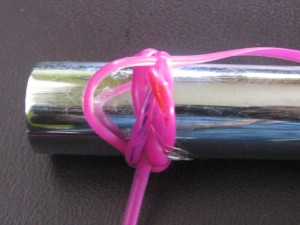
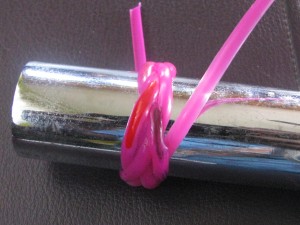
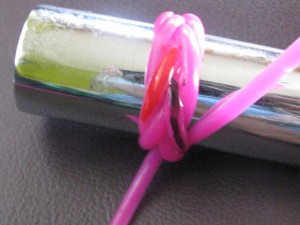
4. Now insert the free end to top right of the X form. Refer the picture below.
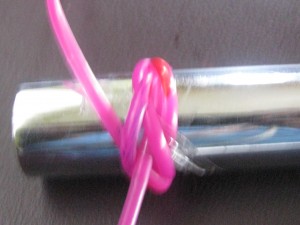
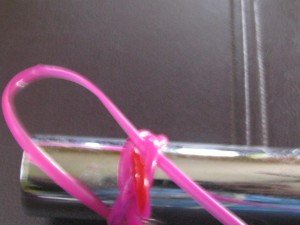
5. At this stage, the ring looks like this. For now on it gets more interesting! So I have marked the wire on the left side with Red Marker and the wire on the right with Dark(Blue or Black) colored marker.
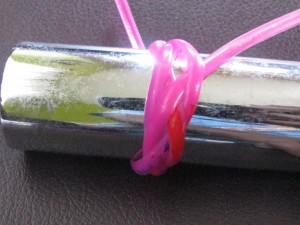
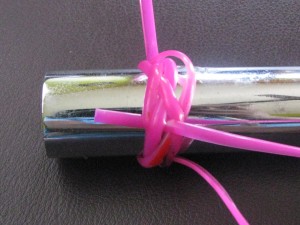
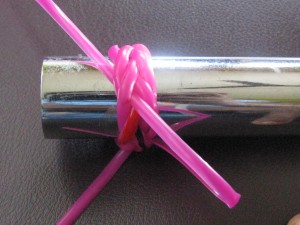
6. Now pull the red marked wire and bring it over the blue marked wire to form a X.
When slightly roll the cylinder, the ring looks like this.
7. Now insert the free end into the blue marked wire by passing over the red marked wire.
When you slight roll the cylinder towards you, ring will resemble the following picture. [Please ignore my sticky tapes… those helped me to hold these wires in one position…] I have continued the markings(Red & Blue) here as well.
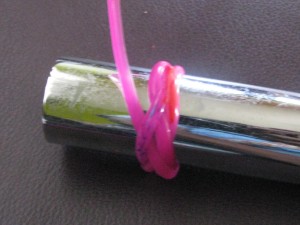
8. Insert the free end into the blue wire, below the short end.
 After inserting, it looks like this…With this we are completing the first round. Like this we have to finish 3 more rounds to get a firm ring!
9. Now I am color coding the wires before I start the second round. The wire from where the free end comes out is marked as blue and to the wire where this blue wire is inserted next is marked as red.
following this blue wire closely and insert the free end to the blue wire by passing over the red wire. Adjust the free end wire in such a way it sits as close as to this blue wire. If my words are confusing to you, then please refer the following diagrams.
Slightly tilt the cylinder towards you. and extend the color markings a little further as shown below.
This step is more important as we will be repeating the same step, again and again on both sides of the ring.
10. Once again…follow the blue wire and insert the free end in to it by over passing the red marked wire.

Make sure that the free end wire sits very close to the blue wire otherwise, the proper shape will not come…soon wires will overlap each other!
11. Once more…color code the wires blue and red…and insert the free end onto the blue by jumping over the red one!
With this we are completing the second round and moving onto the third round!
12. Third round is same as the second round except for one thing! We need to insert the free end into two wires including the blue wire whereas in the second round, it is just the blue wire.
When you closely observe the ring now, the blue wire goes through two wires, the top one is our usual red wire. Underneath the red wire, there are two wires, one is being the blue wire. This is visible clearly when you loosen the ring a little bit by pulling the wires a little further apart. Refer the picture below.
13. Now insert the free end wire into the blue wire and the other wire by passing over the top red wire.
Adjust and pull the wire so that it sits next to the blue wire as close as possible.
14. Repeat the same thing… until you complete the third round.
One more time…
With this we are completing the third round…
15. In the fourth round, we have to insert the free end into three wires instead of two wires as in the third round.

At this point, if you want, you can pull out the ring from the cylinder and complete the ring by holding it in your hands…
Repeat the same thing and complete the fourth round.
16. After completing this round, insert both the ends of the free end wire into inner circle of the ring so that it doesn’t show up on the outside. Alternatively, you can show the ends on flame and paste them on the inside.
In the picture above, I have inserted the ends inside the rings inner circle. That’s all for the single ring.
To make interlocked rings:
While wrapping the wire initially, we have to pass the wire through one completed ring…refer the picture.
When using a cylinder
Without the Cylinder
Everything else is same!
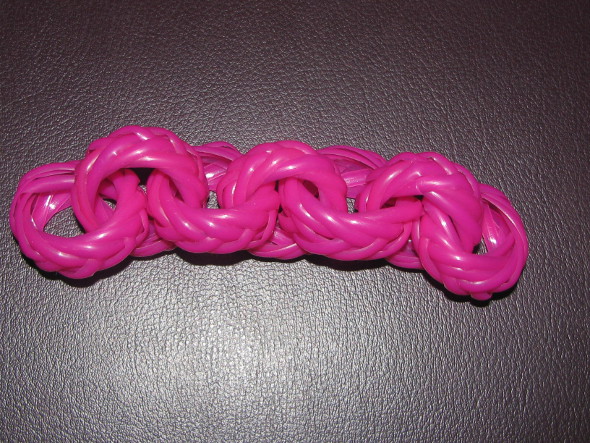
Plastic Wire Links or Chain – 7 Rings
Plastic Wire Rings
Here in this post, I have tried my best to explain the steps as simple as possible. If any of the above steps not clear to you, then please let me know on the comment section.


Hi I am smita.thanks a lot for ring tutorial.it is very clear and neat.i really appreciate your hard work.i am trying to complete the ring but not yet getting.as I am confused from the begining you know it will take some more time I think.you r simply great! Thanks once again. I will try my best to complete the ring and I will inform you ok.
Thanks Smita, for those lovely encouraging comments! Please do share your rings when you are done!…
Hi I am smita here.finally I did it.its wonderful.thanks a lot.
Hi Thanks a lot! … I thought that my tutorial was not so good to keep up….Finally u helped me.
I got little busy with my other schedules lately…so got lost with this basket making process…soon will continue from where I left off….Thanks for yr patience!
hi thank you for all the plastic wire craft. also kindly upload the method of nellikai koodai , biscuit knot koodai and sivan kan knot..these days only very few knows about this craft…pls upload these too…
regards
lavanya sriram
I like to learn strap wires woven on strap basket, anybody knows please teach me
I want to meet plz give me an appointment I will be very grateful