Making a house model using thermocol is always an interesting project. Whenever I need to do some model, say for a school project, thermocol will be my first choice for my base material. In this section, I will show you how to make a thermocol house model in simple easier way. In this model, I have not added any color and in my next post I will change look of this model by adding some poster colors and a tiled roof . As this is a sample model, I am giving you the measurements according to my model which seems to be little larger in size when it is completed(16 inches in height and 18 inches in width approximately). You can increase or decrease the measurements according tp your own design and you can change the look dramatically by doing so.
Safety Measures:
Please note that these thermocol cutters are dangerously very sharp which is very bad for the fingers. So you better ask your parents assistance to cut these thermocol sheets. Always use safety masks while cutting, as these thermocol tend to leave a lot of dust and can a make a great deal of mess if you are working in a windy place near a window or directly under a fan.
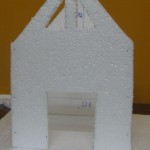
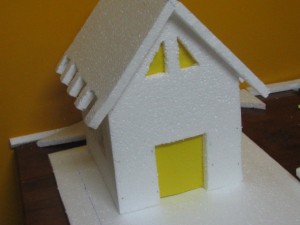
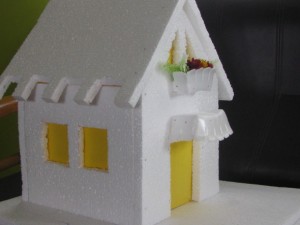
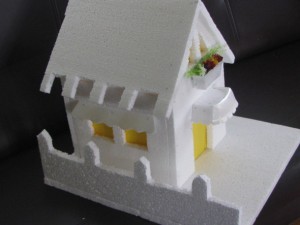
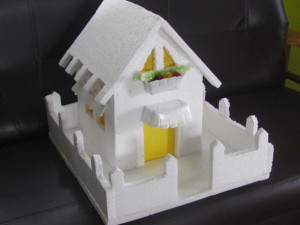
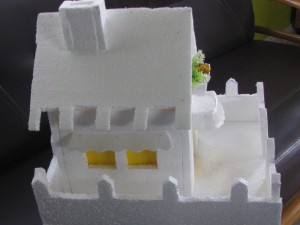
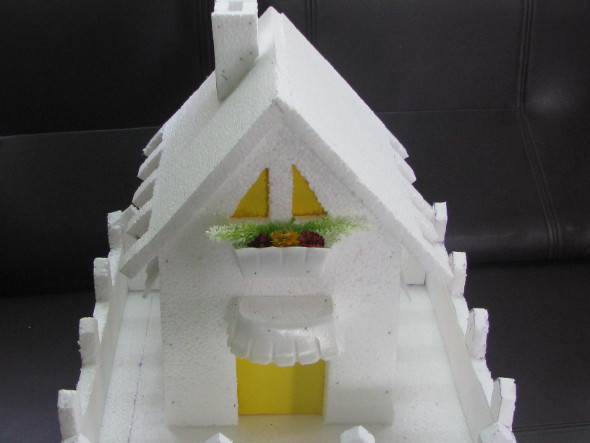
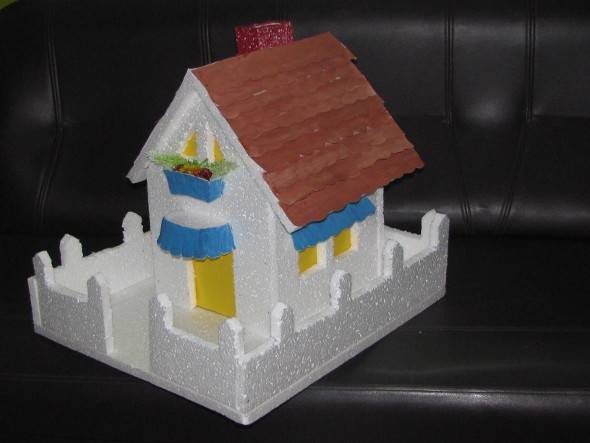
Lets have a look at the finished Model:

Thermocol House Model
If you want to know how to make a similar model on your own, then
- You can watch my YouTube Video
- (or) If its not clear enough then, you can read through the rest of this post for detailed step-by-step instructions. It is a bit elaborate, because I didn’t want to leave any single detail unexplained.
My YouTube Video of this tutorial:
Steps to make a Thermocol Model House:
1. As a first step, lets gather the materials required:
|
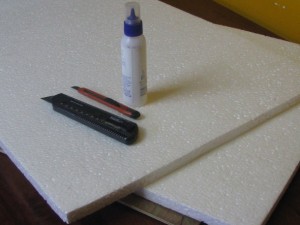 Materials required for making a Thermocol House |
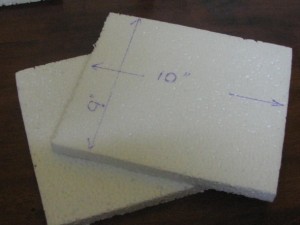
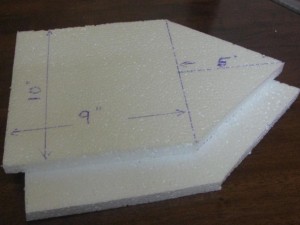
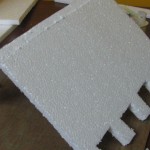
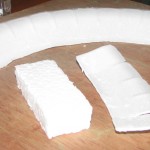
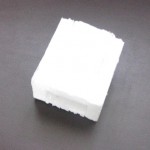
2. Cut 2 smaller pieces of size 10 X 9 inches from thermocol sheet.
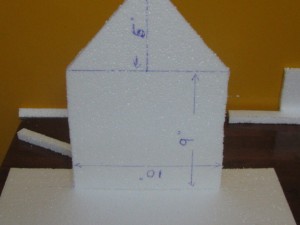
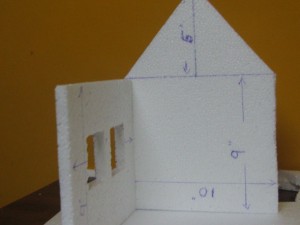
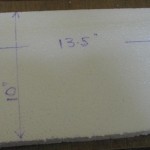
3.Cut 2 larger pieces of size 14 X 10 inch from the thermocol sheet. Draw an equilateral triangle of height 5 inches by leaving 9 inches along the legth. Ref the markings on the image for more details.
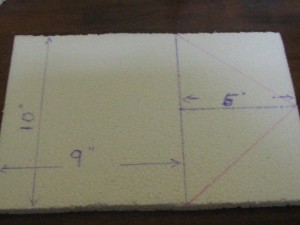
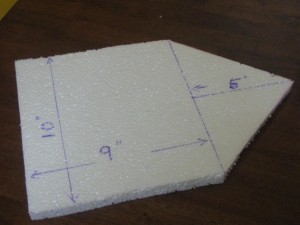
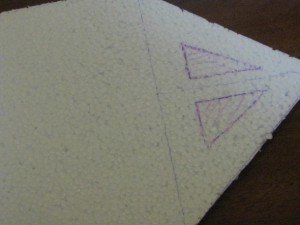
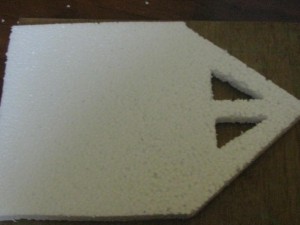
4. Cut along the 2 sides of the triangle. Refer the markings. Do the same thing with the other 14 X 10 inch piece.
 |
 |
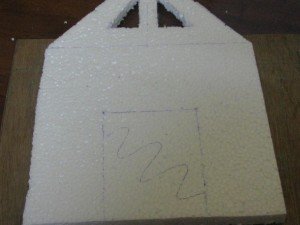
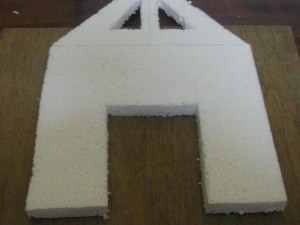
5. Mark for windows in one piece and cut out the space for windows.. This will be your front piece or front wall of your house.
 |
 |
6. Mark for front door on the above(front) piece. Cut out the space for the door.
 |
 |
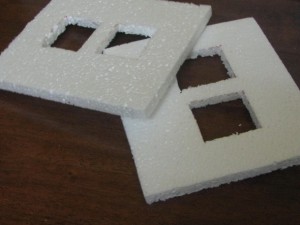
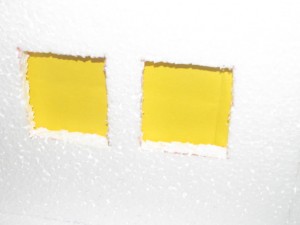
7. Now take the 2 smaller pieces of 10 X 9 inches and mark for double windows. Cut them out neatly.
8. Cut a large piece from thermocol sheet for the base. Now apply glue to one (without the windows) 14 X 10 inch piece and paste it on the base at the far end. This is your back wall.
If glue is not working for you, then use pins for attaching the thermocol pieces together. But handle with care.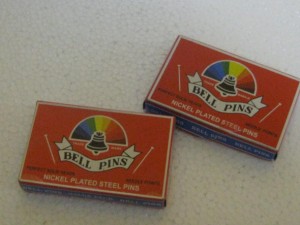
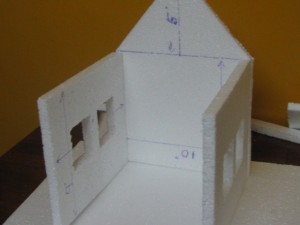
9. Attach one smaller piece to the back wall. Then do the same with the other smaller piece only in the opposite direction.
 |
 |
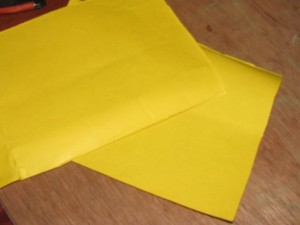
10. Cut rectangular pieces of colored chart paper for double windows (Make sure that these are bigger than both of your window on each side). Now paste them on the inside on both sides of the smaller ones (14 X 10 inch). It is better to paste the chart papers before attaching the thermocol pieces to the base.
 |
 |
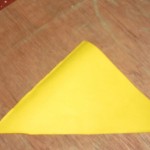
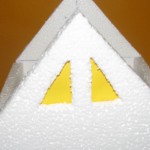
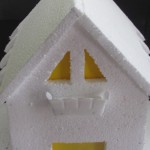
11. Attach the front piece (one with the windows). Cut a triangle slightly bigger than the windows on the front piece from chart and paste it on the inside. It is better to paste the triangular chart before attaching the front piece to the base. It was little hard for me as I did it in the reverse order.
 |
 |
 |
In the similar way, cut a rectangular chart paper for door and paste on the inside of the door. As I said before, do the pasting before you attach the front piece on to the base.
12. For the roof cut 2 pieces of 13,5 X 10 inches from thermocol sheet. Optionally you can cut out small portions or grooves along the edges on both the pieces. Attach both the roof pieces together.
 |
 |
 |
13. Now paste it on the top of the assembly.
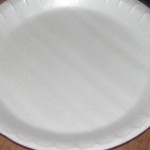
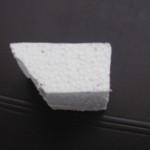
14. Take a thermocol plate and cut and take out the edges.
 |
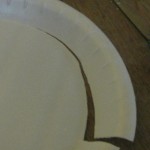 |
 |
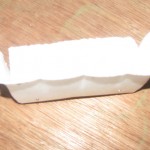
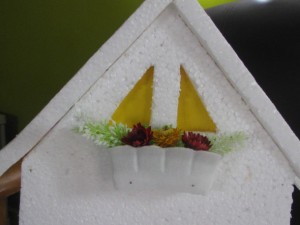
Now take a small thermocol piece and attach the cut out plate edge on three sides. Use pins to hold these two in position. Then fix this assembly to the front piece of the house just under window. As these thermocol plate material is very thin, it will tend to break if you apply pressure while folding around the edges. So handle it gently and use pins.
 |
 |
 |
Add some artificial or dried flowers. It is totally up to you how you decorate this small windowsill.
15. For door, make a bigger rectangle covered with plate edges like the one you did for the windows.
 |
 |
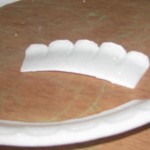
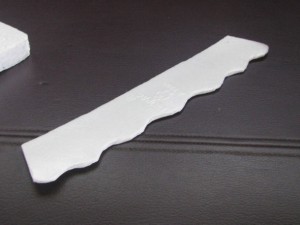
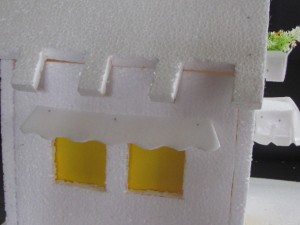
16. From thermocol plate’s flat portion, cut two strips with a wavy edge on one side. Make use of a craft scissor with a wavy edge if you have one. Attach them over the double windows with pins slantingly. Repeat this step for the other double windows.
 |
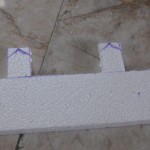
 |
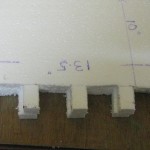
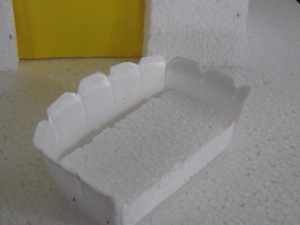
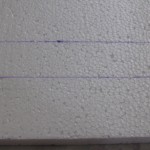
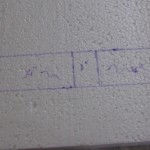
17. For compound wall, measure 3 inches in width and draw a line along the length of the entire thermocol sheet. Draw another line above the previous line of 2 inches width. Now mark one big rectangle of 4 inches and one small rectangle of 1 inch in width. Repeat the pattern along the entire length. Cut and take out all the 4 inch rectangles from the sheet and leave the 1 inch as it is. Mark a triangle at the tip of each bar.
 |
 |
 |
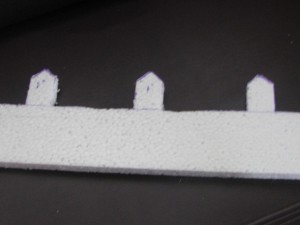
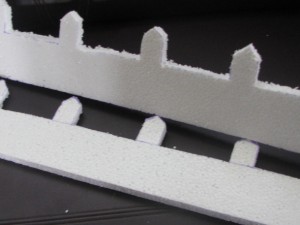
Trim the portion above that triangular markings on each bar. Now your piece looks like the one below. Make enough compound for all the four sides.
 |
 |
18. Attach the compound walls on the base around the house. Secure them with both glue and pins. Complete the wall on all three sides. In the front, cut and leave a small opening for gate.
 |
 |
19. Make a rectangular cube by attaching 4 pieces of thermocol for chimney(like a hollow box). Cut out triangular portion on one side so that it sits properly on the roof.
 |
 |
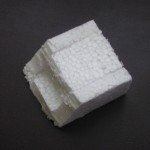 |
20. Attach the chimney to the roof. If the chimney is sitting properly on the roof then, trim more to make more slanting.
 |
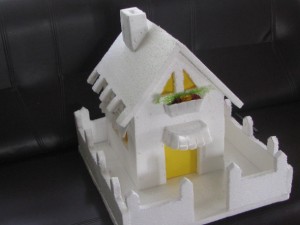 |
That is all my friends. Now your Thermocol Model House looks like this.
In the next post, we will add some colors and a roof to this Thermocol House Model.

SOOO NICE VERY USEFUL
Thanks for the nice comments!
simple make method… thanks
Thanks! Smitha…
excellent tips…thank you soooomuch
Hi,
I am lalitha, for my daughters school project for exhibition in her school i am making this model house, thank you for your tips, your blog is very helpful.
with regards
Lalitha
Thanks, Srilalitha…for your nice comments!
I was looking to your blog of your previous posts, making wire flower vase, making bird and fish in map tape (Fish tape), in early of my childhood me and my sister were doing this, (Your blog recalled my memory), but now i forgot the method. After visiting your blog i want to make birds, can you help me in this.
Hi, thanks … just try with the method I have provided, if u are struck.. please ask me….good luck!
I wish you a very happy and prosperous new year 2015
Wish u the same Srilalitha …sorry just now seeing your mail. Got help with some other work!
Sr i want a model on smart city
Hi Mohit,
Even I want to do a model on a city with card boards…will do it for sure…Thanks!
Hi.. Did this today.. Thanxxxx
Thanks Saurabh Kalra.. 🙂
very simple and nice model. I am making this model now. thank you
Thanks Keerthana! Glad to know that you are making this model!
I love it it is so helpful I past some glitter papers and now it looks great thanks💖💖
Hi,
nice to know that u used glitter papers….thanks for sharing!
thanks a lot. awesome. we made the same model for our Golu Navratri
Thanks a lot Venkat!
Hey ur project gives me lots off tricks thank you so much
It is very nice thanxxxxxxxxx
I loved this one